
Navigation
- Empfohlene Standorte für Wildkameras
- So positionieren Sie eine Wildkamera
- Die Entfernung von der Wildkamera zum Ziel
- Einstellungen für den Kamera-Aufnahmemodus
- Einige andere zu berücksichtigende Faktoren
- Wie kann ich verhindern, dass meine Wildkamera gestohlen wird?
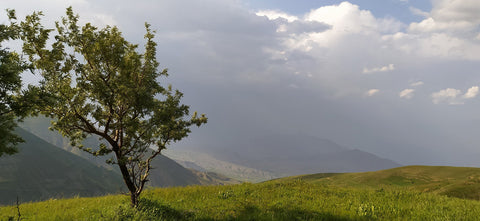
Nutzen Sie Ihre Wildkamera optimal für optimale Tieraufnahmen! Experten empfehlen bestimmte Standorte, Höhe und Entfernung, Aufnahmemodi und Faktoren wie Wetter und Sicherheit. Machen Sie mit unseren Tipps perfekte Tiervideos und -bilder. Lesen Sie mehr über Offroad-Kameras in unserem ultimativen Testbericht zu Wildkameras von Campark.
Empfohlene Standorte für Wildkameras
Eine gute Wildkamera ist der Schlüssel zum Aufnehmen von Tieren. Wenn die Kamera jedoch nicht richtig positioniert ist, ist sie weniger effektiv beim Aufnehmen von Tieren. Damit Sie Rehe oder andere Tiere so schnell wie möglich erlegen können, können Sie versuchen, die Kamera an den folgenden empfohlenen Stellen zu platzieren.
- Griff oder Bank: Je nach Geländekarte vor Ort kann nach Bergflanken, Bänken oder Graten gesucht werden. Griffe stellen unterschiedliche Stellen dar, wie Trichter, Zaunlücken, Sattel und Baumreihen. Der Köder kann zum Fotografieren vor die Kamera gelegt werden.
- Der Grat: Die Spitze des Grates und die Leeseite des Grates. Da das Gelände gekrümmt und verborgen ist, durchqueren Hirsche diese Bereiche, wenn sie sich bewegen.
- Reisekorridor: In dichten Wäldern oder offenem Gelände ist es einfach, Hirsche zu entdecken, indem man nach Spuren und Pfaden Ausschau hält. Beispiel: Einige häufige Bereiche sind Forststraßen, Bäche, Lücken in Zäunen und Viehtriebe. Dies können die Orte sein, an denen sie Nahrung suchen oder vorbeikommen.
- Nahrung: Nahrung ist der Hauptantrieb für Hirsche, sich zu bewegen. Sie fressen gerne Grasrinde, Zweige und junge Setzlinge und ernähren sich von Kräutern, Bäumen, Sträuchern usw. Wenn Sie beobachten, dass die Bäume im Wald abgekratzt, gebrochen oder gefressen sind, ist die Wahrscheinlichkeit hoch, dass Elche anwesend sind.
- Eichenboden: Die Erkennung von Rasenästen im Frühjahr und Sommer wurde auf die Erkennung von Eichenwäldern im Herbst umgestellt. Mit dem Wechsel von Nahrung und Jahreszeiten werden Eicheln zu einer alternativen Nahrungsquelle, die Hirsche suchen. Die Präsenz von Elchen variiert je nach lokaler Nahrungsquelle. Machen Sie sich also bitte mit den lokalen Nahrungsarten vertraut und bewegen Sie Ihre Wildkamera je nach Jahreszeit und Nahrungswechsel.
- Randlebensraum: Hirsche werden oft als Randtiere bezeichnet, da sie viel Zeit in und um Randlebensräume verbringen. Oftmals kreuzen sich an diesen Standorten zwei Lebensraumtypen, wie z. B. Laub- und Nadelbäume, Laub- und Gräser usw.
- Feldecke: Rehe scheinen Feldecken zu bevorzugen, wo Bäume und Felder aufeinandertreffen. Kameras entlang der Ränder zu positionieren, kann eine gute Möglichkeit sein, Rehe zu erwischen, die nachts auf die Felder kommen.
- Wasserquelle: Rehe und andere Tiere brauchen häufigen Zugang zu Wasserstellen. Ein Bach am Waldrand, ein kleiner Teich oder eine Senke im Wald können gute Orte zum Aufspüren sein.
So positionieren Sie eine Wildkamera
Cooler Ort
Kamerafallen verfügen über einen passiven Infrarotsensor (PIR), der diese Kombination aus Bewegung und Änderungen der Umgebungstemperatur erkennt. Unter der Voraussetzung, dass die Temperatur des Hintergrunds unverändert bleibt, erscheint das Tier wärmer als die Hintergrundtemperatur und kann daher leicht erkannt werden. Wärme und Bewegung sind also die Voraussetzungen für den Erfolg von Wildkameras. Große Tiere wie Rehe und Dachse sind leichter zu erkennen als kleinere Tiere wie Mäuse.
Da Bewegungen und Temperaturänderungen leicht von PIR erkannt werden, erkennt der PIR an sonnigen und windigen Tagen auch Vegetation, die sich zu nahe am PIR-Sensor befindet (normalerweise innerhalb von 3–4 Fuß). Aufgrund der Sonneneinstrahlung gibt es einen Temperaturunterschied in der Vegetation, und wenn der Wind weht, löst dies den PIR aus. Um die Erkennung von Tieren nicht zu verpassen, wird empfohlen, die Kamera an einem kühlen Ort zu platzieren. Gleichzeitig kann so die Blendung der aufgenommenen Fotos und die Fehlauslösung durch die Bewegung von Licht und Schatten aufgrund der Bewegung der Sonne vermieden werden.
Einbauhöhe
Laut Wildkameras wird empfohlen, die Kamera auf gleicher Höhe wie das Tier zu platzieren, um die beste Erkennungsleistung zu erzielen. Wenn die Kamera auf der Höhe des Tieres platziert ist, kann sie eine größere Oberfläche erfassen. Wenn sich diese Winkel ändern, indem die Kamera über oder unter der Höhe des Tieres aufgehängt wird, beginnt die von der Kamera erfasste Oberfläche zu schrumpfen. Aus diesem Grund empfehlen Hersteller von Geländekameras, die Kamera für eine optimale Erkennung auf der Höhe des Tieres zu platzieren.
Daher sollten Sie Ihre Wildkamera am besten in der Mitte des Tierkörpers aufhängen. So kann die Kamera Änderungen des Infrarotlichts in der Umgebung am besten erkennen.

"Tierhöhe"
Normalerweise ist ein Hirsch etwa 60–90 cm, ein Elch etwa 120 cm und ein Truthahn etwa 45 cm groß. Sie können die Kamerahöhe entsprechend der Größe des beobachteten Tieres anpassen, damit die Kamera das gesamte Bild erfassen kann. Kennen Sie Ihr Beobachtungsziel und passen Sie die Höhenposition entsprechend an.
Nehmen wir zum Beispiel das Fotografieren von Rehen. Ein zu hoher Winkel kann dazu führen, dass Sie die Erkennung verpassen, ein zu niedriger Winkel führt jedoch zu einer Überbelichtung, was zu „ausgebleichten“ oder „ausgebrannten“ Bildern führt. Stellen Sie sicher, dass die Tracking-Kamera auf Ihre Brust gerichtet ist, wenn Sie genau an der Stelle stehen, an der Sie das Reh erwarten. Neigen Sie die Kamera bei der Installation gleichzeitig in einem 45-Grad-Winkel nach unten. Dadurch stellen Sie sicher, dass das Reh nicht direkt in die Kamera blickt und Sie das Reh nicht verpassen.
Wenn Sie die Kamera über 2 m aufhängen, müssen Sie die Tracking-Kamera von dem Bereich weg bewegen, in dem Sie Tiere vermuten. So müssen Sie die Kamera nicht zu stark neigen und können dennoch einen größeren Bereich abdecken.
Die Entfernung von der Wildkamera zum Ziel
Nehmen Sie beispielsweise das Fotografieren von Rehen als Faustregel. 10 Yards oder weniger ist die ideale Entfernung, um das perfekte Wildkameravideo oder -bild aufzunehmen. Während die meisten Wildkameras eine Reichweite von über 30 Fuß haben, sind sie auch klar genug, um jeden Hirsch innerhalb von 10 Yards zu identifizieren.
Für optimale Ergebnisse beim Aufnehmen kleinerer Säugetiere und Vögel empfehlen wir, die Kamera in der Nähe des Zielbereichs zu positionieren, normalerweise in einem Abstand von 1,5 bis 3 Metern. Bei Tieren wie Igeln empfehlen wir einen Abstand von 1,5 bis 4,5 Metern.
Wenn Sie die Verfolgungskamera auf Körperhöhe des Tiers aufhängen, direkt senkrecht zu seiner Laufrichtung, sollte der durchschnittliche Abstand zwischen den Kamerapositionen zwischen 7,5 und 10,5 Metern liegen. Aber jeder Hersteller und jedes Modell einer Wildkamera hat eine andere Erfassungsreichweite. Da jede Verfolgungskamera ihre eigene Erfassungsreichweite, ihr Sichtfeld, ihre Auslösegeschwindigkeit und ihre Pixel hat, kann dies den Abstand ändern, in dem Sie die Kamera platzieren. Wir empfehlen daher, während der Einrichtung ein paar Mal über die Kamera zu gehen, um den Auslöser zu betätigen. Überprüfen Sie dann die Karte und stellen Sie sicher, dass sie das aufnimmt, was Sie möchten.

„Empfohlene Installationshöhe für die Campark Wildkamera“
Einstellungen für den Kamera-Aufnahmemodus
Kamera-Aufnahmemodus
Zu den gängigen Modi gehören Serienbilder, Videos, Zeitraffer und Serienbilder.
Fotomodus
Dies ist die häufigste und grundlegendste Einstellung für alle Wildkameras. Dieser Modus nimmt bei Auslösung der Kamera tagsüber und nachts Standbilder von Tieren auf. Dies ist ideal, um Nahrung als Köder zu fangen, oft mit dem intakten Tier.
Serienaufnahmen
Bei der Serienaufnahme löst die Kamera ein Bild und mehrere Bilder (bis zu 10) aus. Angenommen, Sie möchten sich nicht auf ein Bild beschränken, sondern ein Bild in höherer Qualität daraus machen. Dann ist der Serienaufnahmemodus Ihre Wahl. Und wenn es mehr darum geht, Ihnen mehr Intelligenz zu geben, ist der Serienaufnahmemodus sehr nützlich. Aber je mehr Bilder Sie hintereinander aufnehmen, desto mehr Speicherplatz wird benötigt.
Videomodus
Dieser Modus wird durch Tierbewegungen vor der Kamera ausgelöst und zeichnet je nach Ihren Einstellungen ein Video von 5 Sekunden, 30 Sekunden usw. auf. Dieser Videomodus ist nützlich, um mehr Informationen zu erhalten, als ein Standbild liefern kann, z. B. Tiergeräusche und -bewegungen.
Zeitraffer
Die Zeitrafferfunktion der Tracking-Kamera nimmt den ganzen Tag über Bilder in ausgewählten Zeitintervallen auf. Wenn Sie nicht sicher sind, ob sich Tiere in der Gegend befinden, können Sie diesen Modus verwenden, um in der Gegend aktive Tiere zu erkennen. Er eignet sich sehr gut für die sorgfältige Beobachtung von Flora und Fauna.
Die Auswahl kann nach den eigenen Bedürfnissen und Beobachtungszielen erfolgen.
Intervalleinstellung
Die meisten Tracking-Kameras haben ein PIR-Intervall zwischen 5 Sekunden und 60 Minuten . Das PIR-Verzögerungsintervall ist die Zeitspanne, die die Kamera wartet, bevor sie eine weitere Runde von Fotos und Videos auslöst.
5-Sekunden-Verzögerung : Sie erhalten mehrere Fotos desselben Tieres.
5-Minuten-Verzögerung : Sie erhalten möglicherweise ein einzelnes Bild von jedem Tier, sofern es nicht länger als 5 Minuten bleibt.
Wenn Sie mit Wildkameras beginnen, empfehle ich, ein Verzögerungsintervall von 30 Sekunden einzustellen. Nachdem Sie eine Zeit lang in 30-Sekunden-Intervallen aufgenommen haben, können Sie das Auslöseintervall je nach den Bedingungen und dem gewünschten Filmmaterial verlängern oder verzögern.
Einige andere zu berücksichtigende Faktoren
- Wetter: Eine gute Kamerafalle hält extremen Wetterbedingungen stand, darunter Regen, Schneeregen, Schnee, Hagel, Stürme, Eis und mehr. Nur weil eine Kamera eine allgemeine Wasserbeständigkeit aufweist, bedeutet das nicht, dass sie wasserdicht ist. Achten Sie auf steigende Wasserstände, wenn Sie Ihre Kamera in der Nähe eines Flusses oder Baches aufstellen möchten. Achten Sie darauf, das Wetter zu überprüfen, wenn Ihre Kamera durch eine plötzliche Überschwemmung überschwemmt wird.
- Geruch: Reduzieren Sie die häufige Erkennung der Kameras, da häufige Bewegungen zum und vom Erkennungsbereich zu starker Geruchsbildung führen können. Tiere haben außerdem einen ausgeprägten Geruchssinn, der sie leicht wachsam gegenüber dem Standort machen kann.
- Speicherkartengröße: Da die Kamera im Außeneinsatz verwendet wird, können Sie die Kamera während dieser Zeit nicht häufig überprüfen. Wenn die von Ihnen gekaufte Speicherkarte zu klein ist, ist der Speicher schnell voll, da zu viele Bilder oder Videos aufgenommen werden. Es wird empfohlen, die größte Speicherkarte zu kaufen, die Ihre Tracking-Karte verarbeiten kann.
- Vegetation entfernen: Zu viel Laub oder Gras kann Sie daran hindern, ein gutes Foto zu machen. Einige kleine Zweige oder Gras müssen sorgfältig von der Kamera weggeschnitten werden. Achten Sie jedoch darauf, nicht zu viel Vegetation zu entfernen, da dies sonst zu Störungen führt. Achten Sie gleichzeitig auf die Wachstumsrate der umliegenden Pflanzen. Wenn die Pflanzen zu schnell wachsen, wird die Kamera bald von den Pflanzen überwältigt und Sie haben möglicherweise Schwierigkeiten, sie wiederzufinden.
Wie kann ich verhindern, dass meine Wildkamera gestohlen wird?
Eingesperrt
Befestigen Sie Ihre Wildkamera mit einem Kabelschloss, einem Kabelschloss oder einem preiswerten Fahrradschloss an einem Baum, um zu verhindern, dass jemand Ihre Kamera einfach mitnimmt. Diese Methode ist zwar sehr effektiv, erfordert jedoch mehr Geld und Installationszeit.
Wenn Sie die Kameras hoch aufhängen, sind sie außer Sicht und schwer zu erreichen. Bringen Sie Trekkingstöcke mit und hängen Sie die Kamera 2,5 bis 3 Meter über dem Boden auf. Aber jedes Mal, wenn Sie Ihre Kamera überprüfen, Trekkingstöcke mitnehmen zu müssen, kann lästig sein.

4G Wildkamera - Echtzeitüberwachung
Wenn ein Tier oder eine Person erkannt wird, können Sie sofort eine Benachrichtigung erhalten und Bilder und Videos direkt an Ihre Hand senden. Wenn Sie feststellen, dass die Kamera gestohlen wurde, kann Ihnen diese Funktion möglicherweise dabei helfen, den Dieb zu fassen.
Campark ist einer der Branchenführer auf dem Markt für Offroad-Kameras und bietet eine Vielzahl von Offroad-Kameradiensten an. Das Unternehmen bietet professionelle Ausrüstung und eine Vielzahl von Kameraoptionen, die auf die unterschiedlichen Bedürfnisse der Kunden in verschiedenen Szenarien zugeschnitten sind. Wenn Sie eine 4G-Wildkamera oder eine Low-Glow- oder No-Glow-Wildkamera benötigen, können Sie sich gerne an uns wenden.